Drop Down MenusCSS Drop Down MenuPure CSS Dropdown Menu
Showing posts with label Creative Projects. Show all posts

July 21, 2020

My Potting Wreath

 I created this wreath after seeing Mary's Patriotic Wreath from  
Home Is Where The Boat Is.  I fashioned it after hers but put my own twist to it.

 The back of the house rarely gets wet so I hope it will be safe!

 We moved the hanging planter over by the window so I could have room for the wreath.  It's too deep and big for the door but I like it back here because this is the heart of my gardening.  It's very overcast today forgive the darkness.

 Browallia Endless Flirtation, Hypoestes Hippo White and Stained Glass Royalty Coleus

 I found the watering can at Menards (very inexpsive) Menards is kind of like Home Depot

Found an old brass water nozzle in our supplies.

 I wrapped chicken wire that came on a spool around the wreath along with this cabbage rose print that fit in nicely with what I was doing.

 I attached some seed packets to the wreath like Mary did.

 I hot glued the seed packets in place.

 Found these gardening gloves with a similar aqua tone as the ribbon plus some yellow like the watering can.  I hot glued them too.

 I made up a bow which also hides the larger tie-wrap that's holding the hose to the wreath.

I bought everything right after I saw Mary's post which was the end of May but didn't get around to putting it together until now.  😀
Thanks for stopping by and I hope you liked this! 

November 4, 2018

Amaryllis For The Holidays

This is the time of the year you can get the Amaryllis bulbs and starting growing them for the holidays.
It's dark and overcast outside so I used my manual settings to get lighten things up.  As you can also see in the background my "Thanksgiving" cactus is in full bloom!

We were at Home Depot and I spotted these wax coated Amaryllis that you don't have to water. A couple of years ago I ran across this idea of growing them in a tall glass cylinder at a garden center.  I shared a post of my visit to Terrain in Pennsylvania which you can see "here".  Lots of inspiration for the holidays there!

I thought I'd share the basic info for growing these which as you can see is going to be very easy!

I had two glass cylinder vases that I knew would work.  I decided to dress it up a bit to  so I picked up some gold painted glass chips and reindeer moss (Michael's).

I had some wired ribbon that I figured would give it a bit more of a festive look.  The larger check is new from JoAnn's.  The also have it in a much larger 4" size.   

I used the whole container of gold pieces and made a little indent in the center for the bulb to rest.

The bulb comes with a wire stand so you can set it on any surface to grow.

The bulb is heavy so I layered a bunch of the moss knowing that the bulb would crush it down a bit.

And here they are!  I hope they don't grow too fast!  One thing I never liked about growing Amaryllis is how long the leaves are plus the stem of the flower can get a bit tippy so I hope this will work out well and cure those issues.  If you try this just make sure your cylinder is large enough to place these in.  For reference the inside measurement of my cylinders is 4 1/4" across.  

I love what the ribbon added!
I hope you liked this and find some inspiration from it!

I will be joining:

September 13, 2018

Fall Welcome Wreath

2 years ago I put this Welcome Wreath together using an older wreath I had on hand as seen "here".

I came across this wreath at JoAnn's for half off ($20).  I liked the orange flowers which will catch the eye from a distance. This will be sandwiched between the storm and entry doors so I can't really add much.  
If you enjoy a more elaborate wreath you should check out the Halloween wreaths that Debbee from Debbee's Buzz created- she's really talented! "Here" is a link to it.

I de-wired the welcome part from the owl welcome sign on the other wreath and added it to this one.  The bright green just happened to go well with the some of the accent leaves on this new wreath.

I hung it on a nail that was already on the outside wall but I will transfer it to the entry door soon.  I got a new look for a low buck and I donated the older wreath with the owl.  Win- win!

I still have the wreath with the blue hydrangeas on the door for now as seen "here".

This is a link "here" to my "Autumn Woodland Wrapping" wreath I put together last year.  It has an adorable fox on it.

I guess I'm wreathed out for now!

Joining:


September 2, 2018

Whimsical Stacked Pumpkins

I created this whimsical stacked pumpkin display in my new MacKenzie Childs Spookarella Pumpkin Cart.  I had my eye on it last year but didn't want to pay as much as they were asking.  I happened across it recently and it's on sale for half off.  There were 2 sizes originally and this is the smaller one (the only one available now).  I've included the link below (not making money on it- just sharing).

"link"

It's really cute and when I display it for Halloween I will have it set up with a few other things to make it more festive.

I found the pumpkins at Pier 1.  They are sold as a 4 pc. ornament set.  Made of styrofoam so they were easy to glue together and stack the way I wanted.


The orange one at the bottom is glued to a larger piece of foam that was sprayed with a little black paint so it would help disguise it.  I used some fall blend excelsior to stuff around the foam to keep it in place and add a little texture.  I found floral picks with leaves, berries and pumpkins to fill in around the stacked pumpkins.  I wanted it to look very "Halloweenish"!


The witche hat was found as part of a three pack at Hobby Lobby (in the floral area).  It came with a long stick so you could add it to an arrangement.  I cut off the stick and glued it on.  I did a lot of hunting to find it and I couldn't be happier!  

I won't be displaying this for a while yet but after I found the cart on sale I decided to embellish it.  The supplies are good at the craft stores but they start to dwindle so I didn't want to wait.  I had noticed a lot of stacked pumpkin creations at the stores which sparked the idea in my head for this.  It's going to look real cute once I pair it up with the witch I have to go with it!

I hope you liked my Whimsical Stacked Pumpkins!


August 26, 2018

Grandin Road Inspired Wreath


I received a catalog from Grandin Road and was smitten with this wreath.  The price however of $139 wasn't what I had in mind.  It looks especially attractive on this blue door.

I was bummed about the price but also inspired so I went to Hobby Lobby, Michael's, JoAnn's and Pier 1 to look at wreaths.   I was able to find some silk flowers at Michael's that resembled the look created here on this wreath, but when I added it all up I was getting way up there in costs and I figured if I'm spending that much I may as well buy the one by GR.  I went on line to look at the wreath and found out it's already sold out/no longer available.

I realized it was cheaper to buy a ready made wreath (in most cases) vs. making my own especially with silk flowers.  Most of the fall wreaths currently available have lots of sunflowers and/or a lot of fall colored leaves, pine cones and pumpkins.  This one caught my attention at Pier 1 (called the Faux Rudbekia wreath) because it didn't have a super heavy fall look to it and certain things about it seemed similar to the other one at Grandin Road so I grabbed it.  Even though this is very nice as it is I decided that blue hydrangeas were needed to really achieve the look I wanted.


I didn't find antiqued blue hydrangeas like they used in the Grandin Road one, but this is what I came up with.  Since I had to cut the hydrangeas off of very long stems I had a bunch of leaves leftover so I used some of them to fill it in a bit.  The Grandin Road wreath had magnolia leaves but to save money I felt these would work well enough.

I think this is a great transitional look between late summer and fall especially since the Rudbekia (cone flowers) are still blooming here.  If I find some antiqued blue hydrangeas I may swap them out but I'm happy at this point!

This did have some blue flowers (I think they look like Bachelor's Buttons) but it wasn't enough of an impact.  Pier 1 also had a wreath with some very faded looking blue hydrangeas but in person I thought it was very dull.

There are no pumpkins on this wreath but I felt the deep reddish/orange rudbekia's filled in for them.  I know it's not quite as beautiful as theirs but overall I think this was a good compromise.  I did get the wreath on sale so that was very helpful ($29.99 down from $39.99).  The hydrangeas came from Hobby Lobby (1/2 off).  

I hope you liked my Grandin Road Inspired Wreath!

I do have another wreath that I created last year with an adorable fox made with curled wood pieces that I'll switch to for October/November as seen "here".

I am joining:


July 10, 2018

New Fairy Cottage, Updated Bird Feeder Station and Lanterns


I found this little planter at our JoAnn fabrics store.  It had no roof because they designed it to be a planter for either faux or real plants.  It has two holes in the bottom for drainage.  My first impression was it looked like a fairy house and wouldn't that be cute for the fairy garden!  With no roof I dismissed it but came back 10 days later and it was marked down even more and Dan figured we'd find a way to put a roof on it.

Dan and I talked a bunch about it and a metal roof was under consideration but I got it in my head to find something like a tile to use for the roof.  

After searching the tile section at a big box store I spotted a pile of natural slate tiles and I knew that was the ticket.  It offered a rustic, not so perfect look.  We spent $1.88 on it!  Woohoo! 😉

Dan is a great project guy and is pretty much always willing to help with my ideas.  He cut up some cardboard to create a template and went to work.

We don't own a tile cutter but this little grinder with a diamond blade worked well enough for what we wanted to do.  

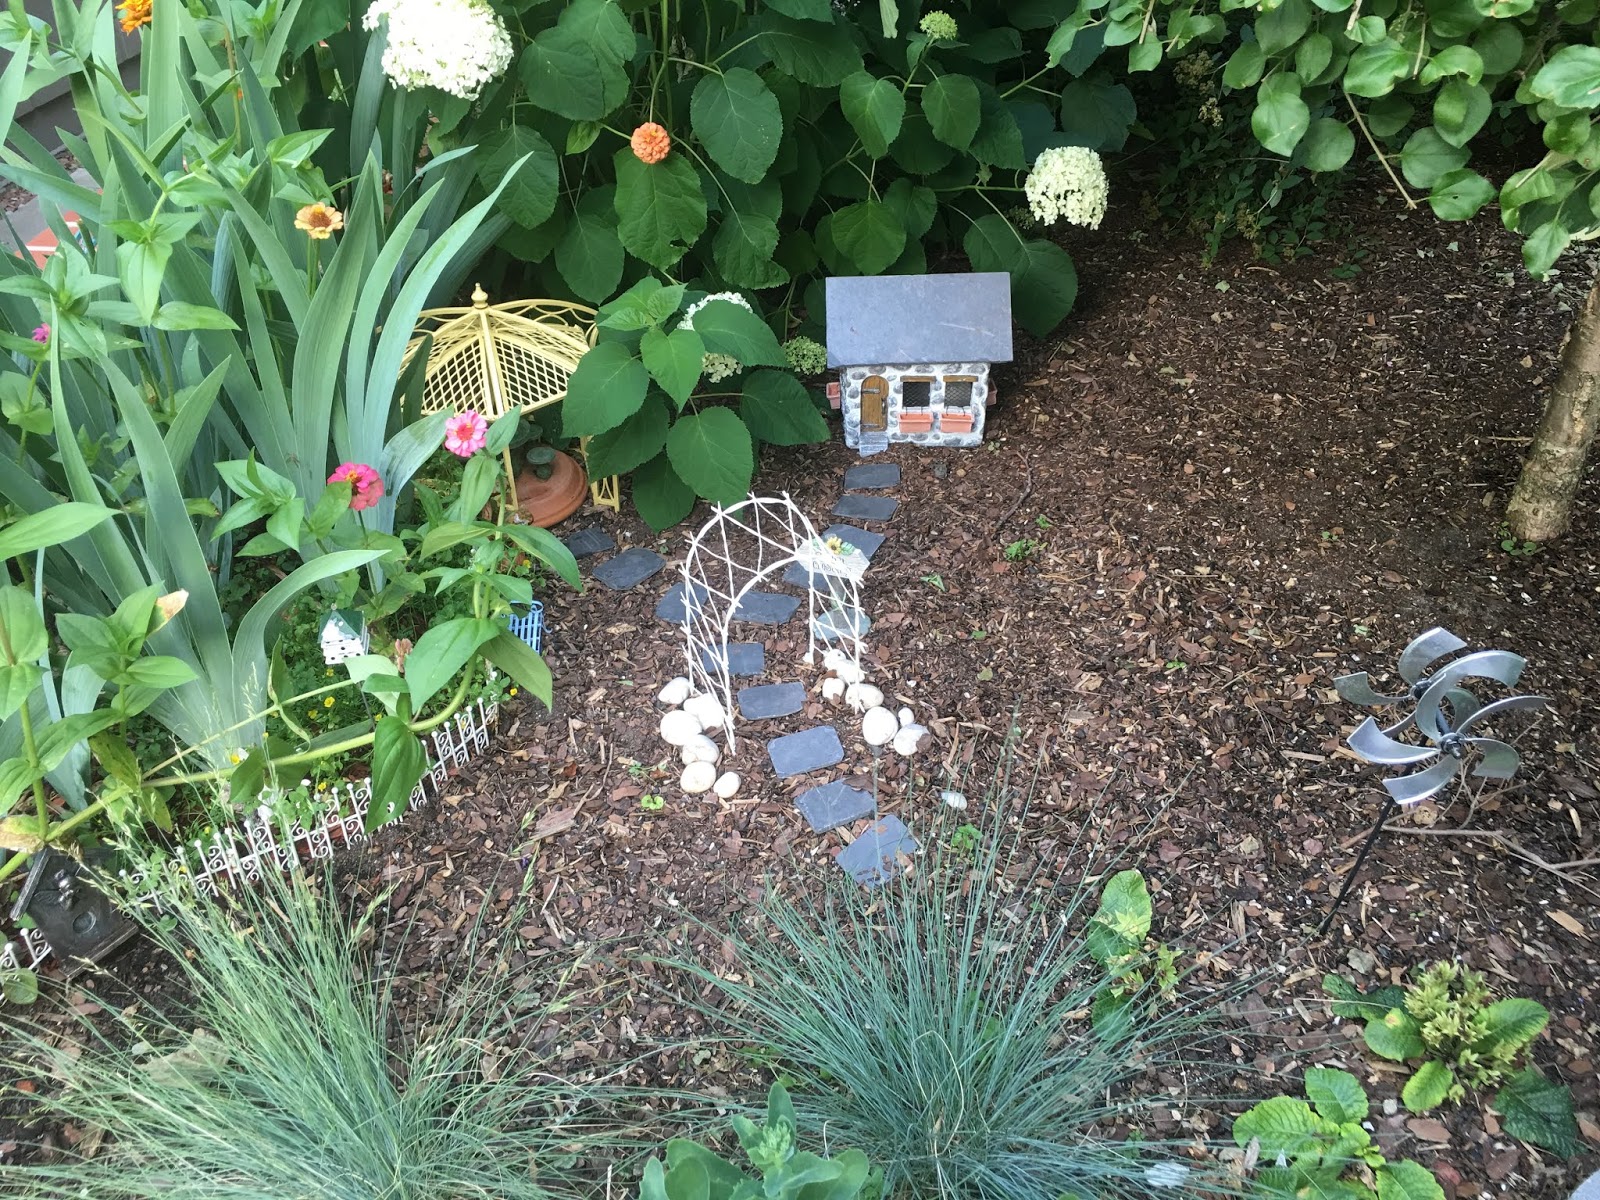
He used E6000 glue to set the tile roof pieces. Because the little cottage is not truly square there are gaps where it didn't make good contact so after it dried for a day he used a clear silicone underneath to create a nice seal.   I am so thrilled with how well the slate worked out.  

There were two strips of slate left over and I had him cut them into sections.  I used a hammer and pounded the edges to make them look less perfect.  Some pieces split in half so I ended up with extra stones to make the path.  Win win!

This is hot off the press and I haven't even set any fairies out there or put flowers in the window boxes!  


Now on to the bird feeder station!
This is a picture from earlier this spring.  Our bird feeder post was pretty crappy looking and I came up with the idea to paint it white like the house trim and accent it with black.

He removed the old post and sanded off the hardware and spray painted it right on the old post which worked out nicely.

I never took pictures of the painting of the post but you can see I also had him add two black stripes on it.  The cylinder shaped piece is a baffle to stop squirrels, chipmunks, and raccoons.  

I also got the idea of having a light on the top.  We found the fixture at Home Depot which he painted white to match the post.  He drilled it in two spots to make sure it would stay securely on top since birds are likely to land on it.  

I love how it looks and at night it casts a nice glow.

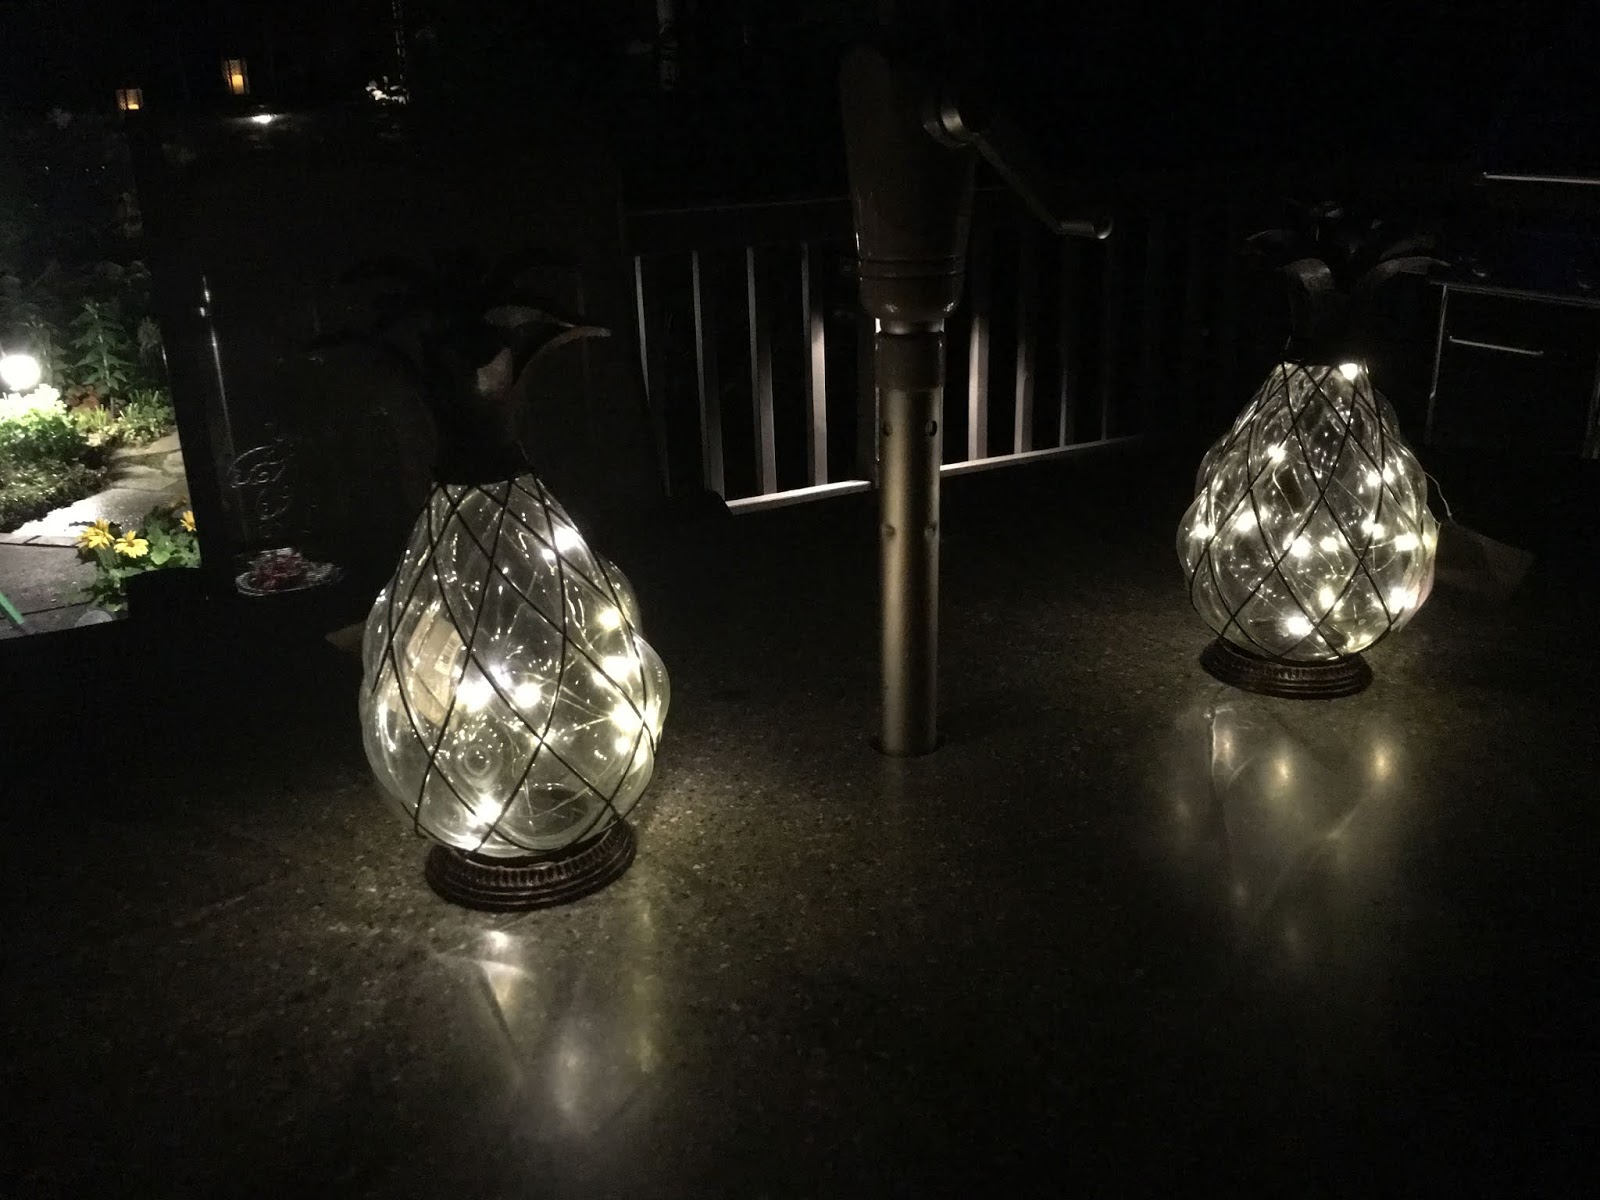
My phone camera does a fair job but it does look a lot better than this.  The lanterns in the forefront were found at our grocery store called Meijer which has a lot of household things too.  They are a solar LED lighted pieces (Kathy Ireland Home & Garden, Solar Firefly Lantern). 

I had my eye on some that were on Frontgate's website for $79 and $99.  I paid $30 for each on sale but were only $39.99 to begin with.  Mine is larger than their small one but not quite as big as their largest.  Theirs requires a candle for light but I like these better since they run on a timer and are solar charged. 


Glad to finally have these projects done and to have found these lanterns!  

Joining:

ABOUT ME


Welcome to Home and Gardening With Liz. I have combined my previous blogs “Infuse With Liz” and “Sit With Me In My Garden” into this new blog. I love interior decorating and gardening. I enjoy redefining interior spaces by moving things around and reusing decorative items already found in the home. I also enjoy creating tablescapes and an occasional crafting project. I'm so pleased you've stopped by. I invite you to follow me and I do hope you will keep coming back! Liz
 Follow My RSS Feed  Follow My Google+  Contact Me Follow Me on Pinterest